Quality over Quantity
The characteristics of the cane have a significant influence on the success of our reed making. The appearance of the cane is often deceptive and we quickly learn:
The truth lies beneath the surface.
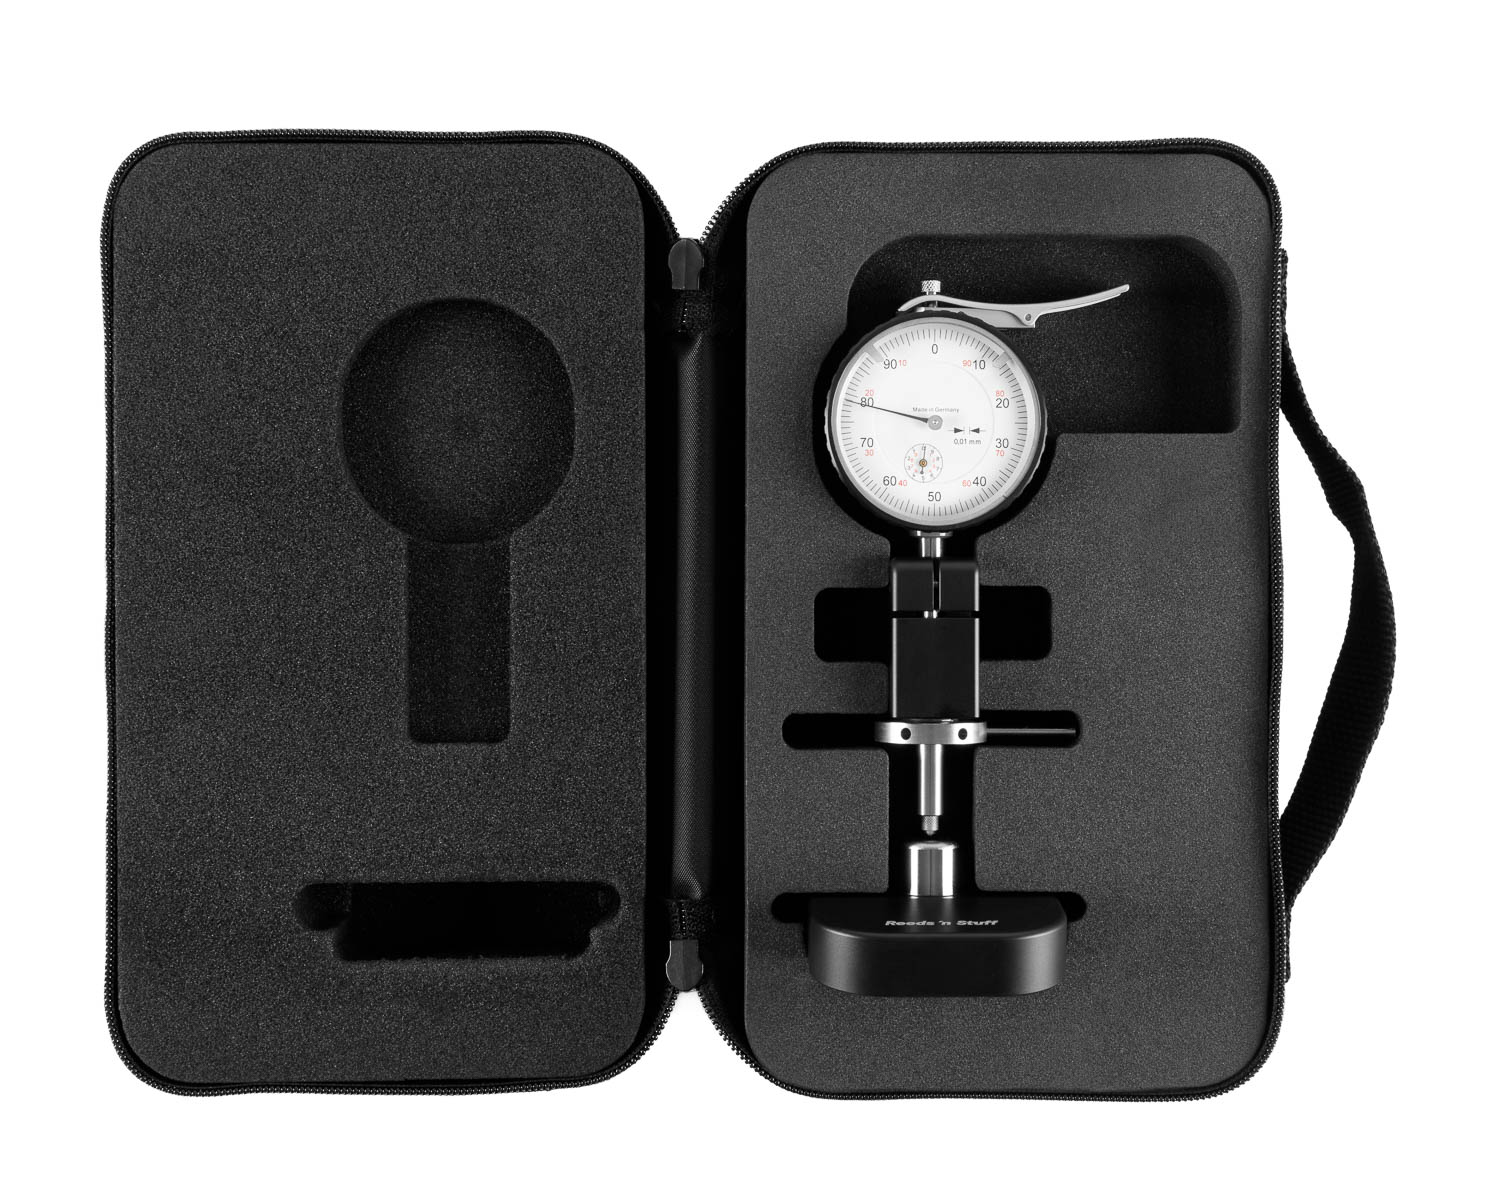
The hardness tester offers an objective way to judge the quality, not just the quantity of cane. By measuring the hardness of the cane at both ends we are able to discern whether a piece of cane has the same qualities throughout the entire piece. This way we can ensure that the two blades of a reed will vibrate similarly.
Save yourself valuable time and increase the quality of your reed making.
Achieve reliable and repeatable results.
Our hardness testers are available in both analog or digital formats.
The precision of both devices is identical, the only difference lies in the convenience of use.
The Arbours A and B are for Clarinet and Saxophone.
With type A you will measure at the vamp, whereas type B is for measuring
at the flat inside of the reed.
-
-

-
The Reeds 'n Stuff transport case features a simple design that's easy to use. The foam interior allows a safe transport and provides a snug fit. Other tools can be stored in the zipper closed compartment on top of the case. The handle gives portability wherever you need it.
Buy
-
First of all, the time saved in selecting suitable canes for you offers a great advantage. You save valuable working time that you would otherwise spend gouging, shaping, tying on and scraping canes that would not have given you a suitable result anyway. More important, however, is the fact that you can increase the quality of your reed making and get more reliable results.
Should the cane be measured dry or soaked?It should be noted that only sufficiently dried cane will give useful results. It is not advisable to use soaked cane. It is best to note the test results on the cane and later on the staple. This will give you an overview of what works well for you personally.
In what stage should the cane be measured for hardness?It is best to use the hardness tester after pregouging if you have a pregouging machine. The basic requirement is a smooth surface and a consistent thickness. If you use the small pregouger instead of a machine, you should test the cane after gouging.
Are the measuring results for pregouged cane the same as for gouged cane?If the material is thicker, the measurement results will be higher.
What are the usual measuring results?Usually we get readings from seven hundredths (hard) to almost 40 hundredths (soft).
Are there different measurement results for the hardness testers?Yes, as there is no standard scale and the factory tolerance of the dial indicator is 2 hundredths, it is possible that the hardness testers show different results.
Is there a difference between the hardness tester for oboe, bassoon, clarinet and bagpipe?Yes, the hardness testers have each been set up for a specific instrument. The heights of the support plate differ. The so-called arbour, on which the cane lies, is available individually, allowing you to convert your machine for other instruments.
Can the hardness tester be used as a dial indicator?The support plate of the hardness tester is too large to obtain precise results. The thickness of finished reeds, for example, cannot be measured in any case. Also with gouged cane inaccurate measurement results may occur. For this reasons we do not recommend to double the hardness tester as a dial indicator.
What is the difference between the analog and digital hardness tester? Which one is more accurate?Both differ only in the convenience of the reading. With the digital hardness tester, the zero position can be reached by pressing a button. With the analogue hardness tester, the dial has to be turned. The precision of both devices is the same. If required, you can connect the digital hardness tester to your computer to create personal statistics.
The digital dial shows a number and SET blinks. The number shown does not change even if I move the axle up or down.Please keep ZERO pressed for 3 seconds. This erases the SET memory.
When do I have to change the battery?The battery must be changed when the display flashes, the battery symbol appears, or nothing is displayed. The battery indicates the type used (e.g. LR 44).
How do I change the battery? Do not touch the new battery with your fingers, use a piece of cloth. The battery compartment is located on the upper left side of the dial gauge. Use a small screwdriver or the tip of a sharp knife to lift off the small plastic cover. Insert the new battery exactly as you found the old one. When inserting the new battery be careful not to touch, bend, or break the battery contacts (the small pieces of metal inside the dial gauge).
You can find detailed instructions here.
- Battery
- LR44
- Manufacturer
- Reeds 'n Stuff
Contact
Reeds 'n Stuff GmbH
Karlsbader Straße 88c
09465 Sehmatal-Cranzahl
Germany
info@reedsnstuff.com
with limited physical, sensory or mental abilities.
There is a risk of injury if used improperly.
This product is intended to be used indoors.
