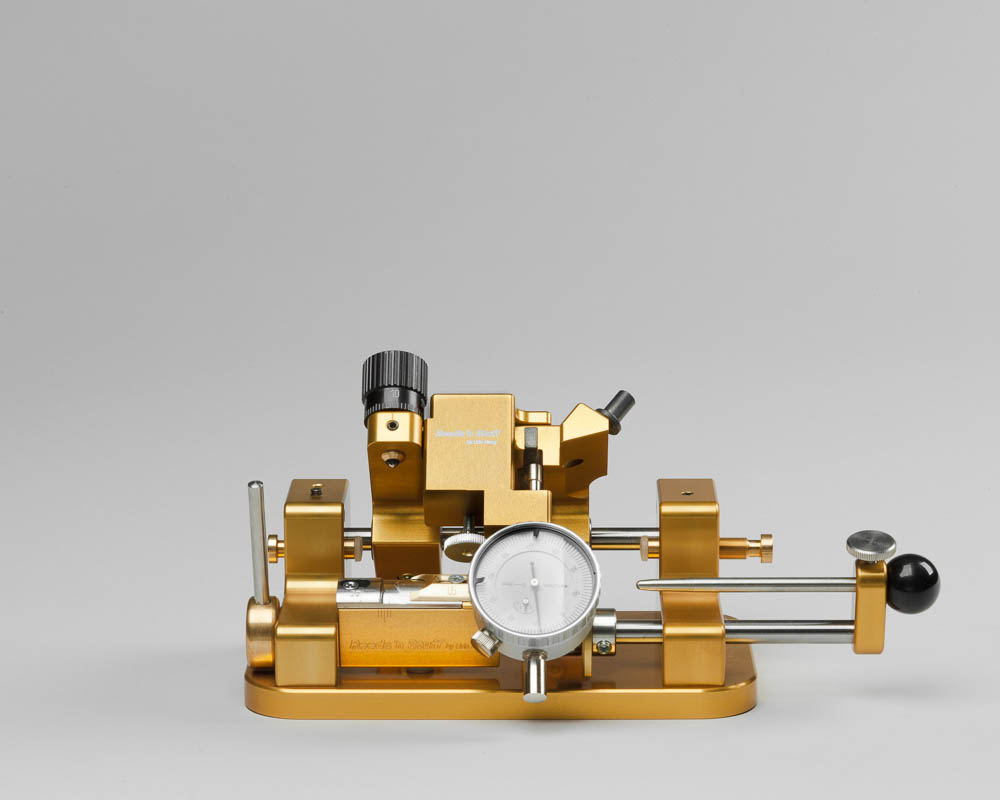
Dial it in
Simply adjust the blade of your Profiling Machine with our new Blade Adjustment Indicator.
-
-
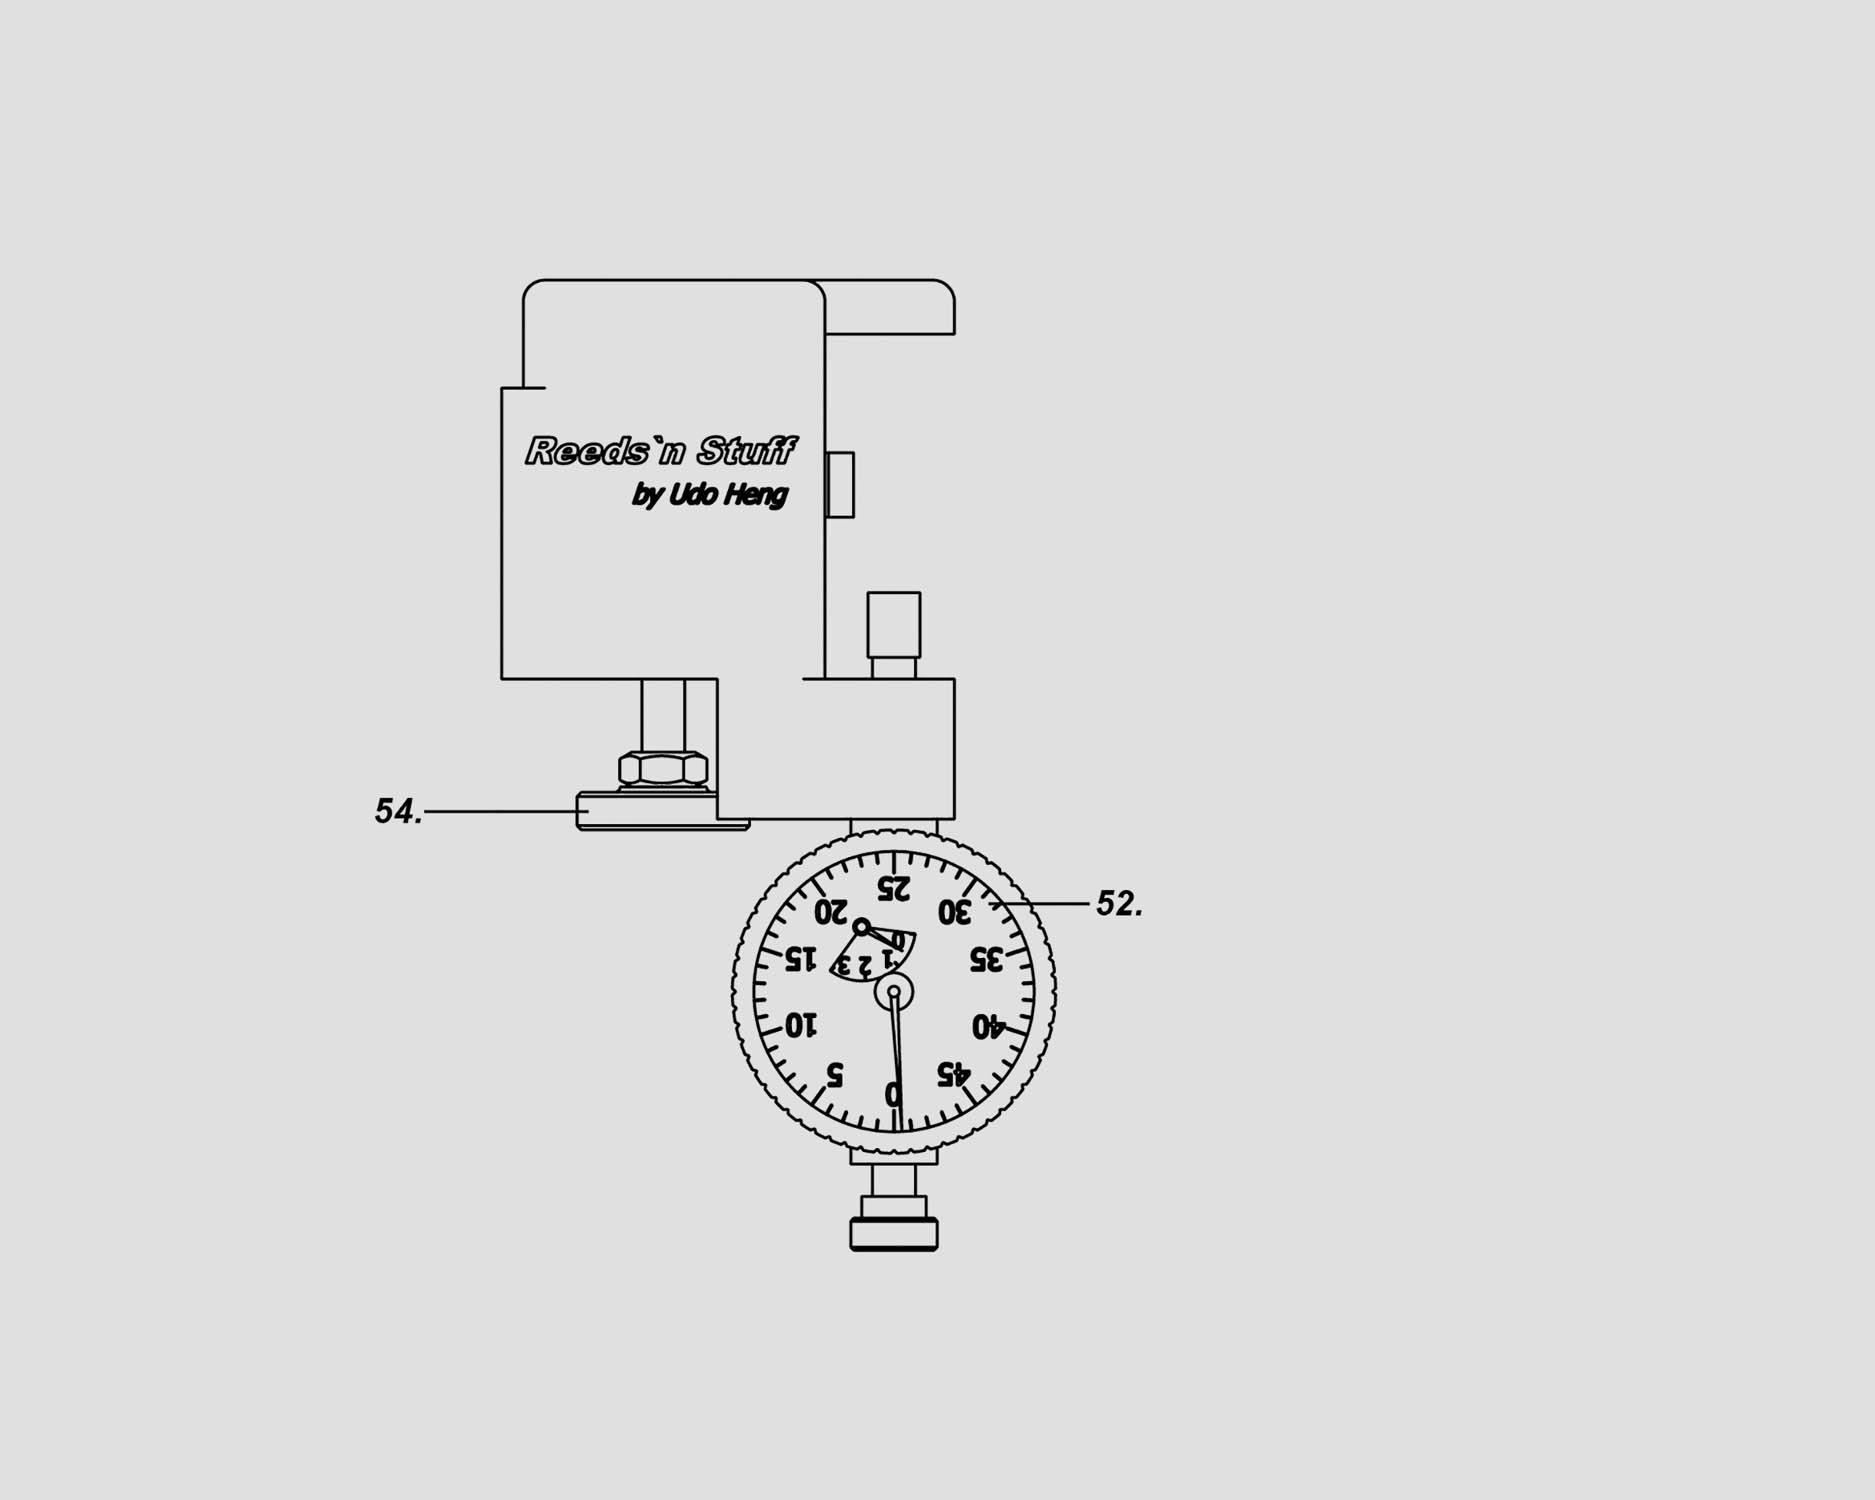
52 Clock Face
54 Srew
57 Measuring Pin
-
-
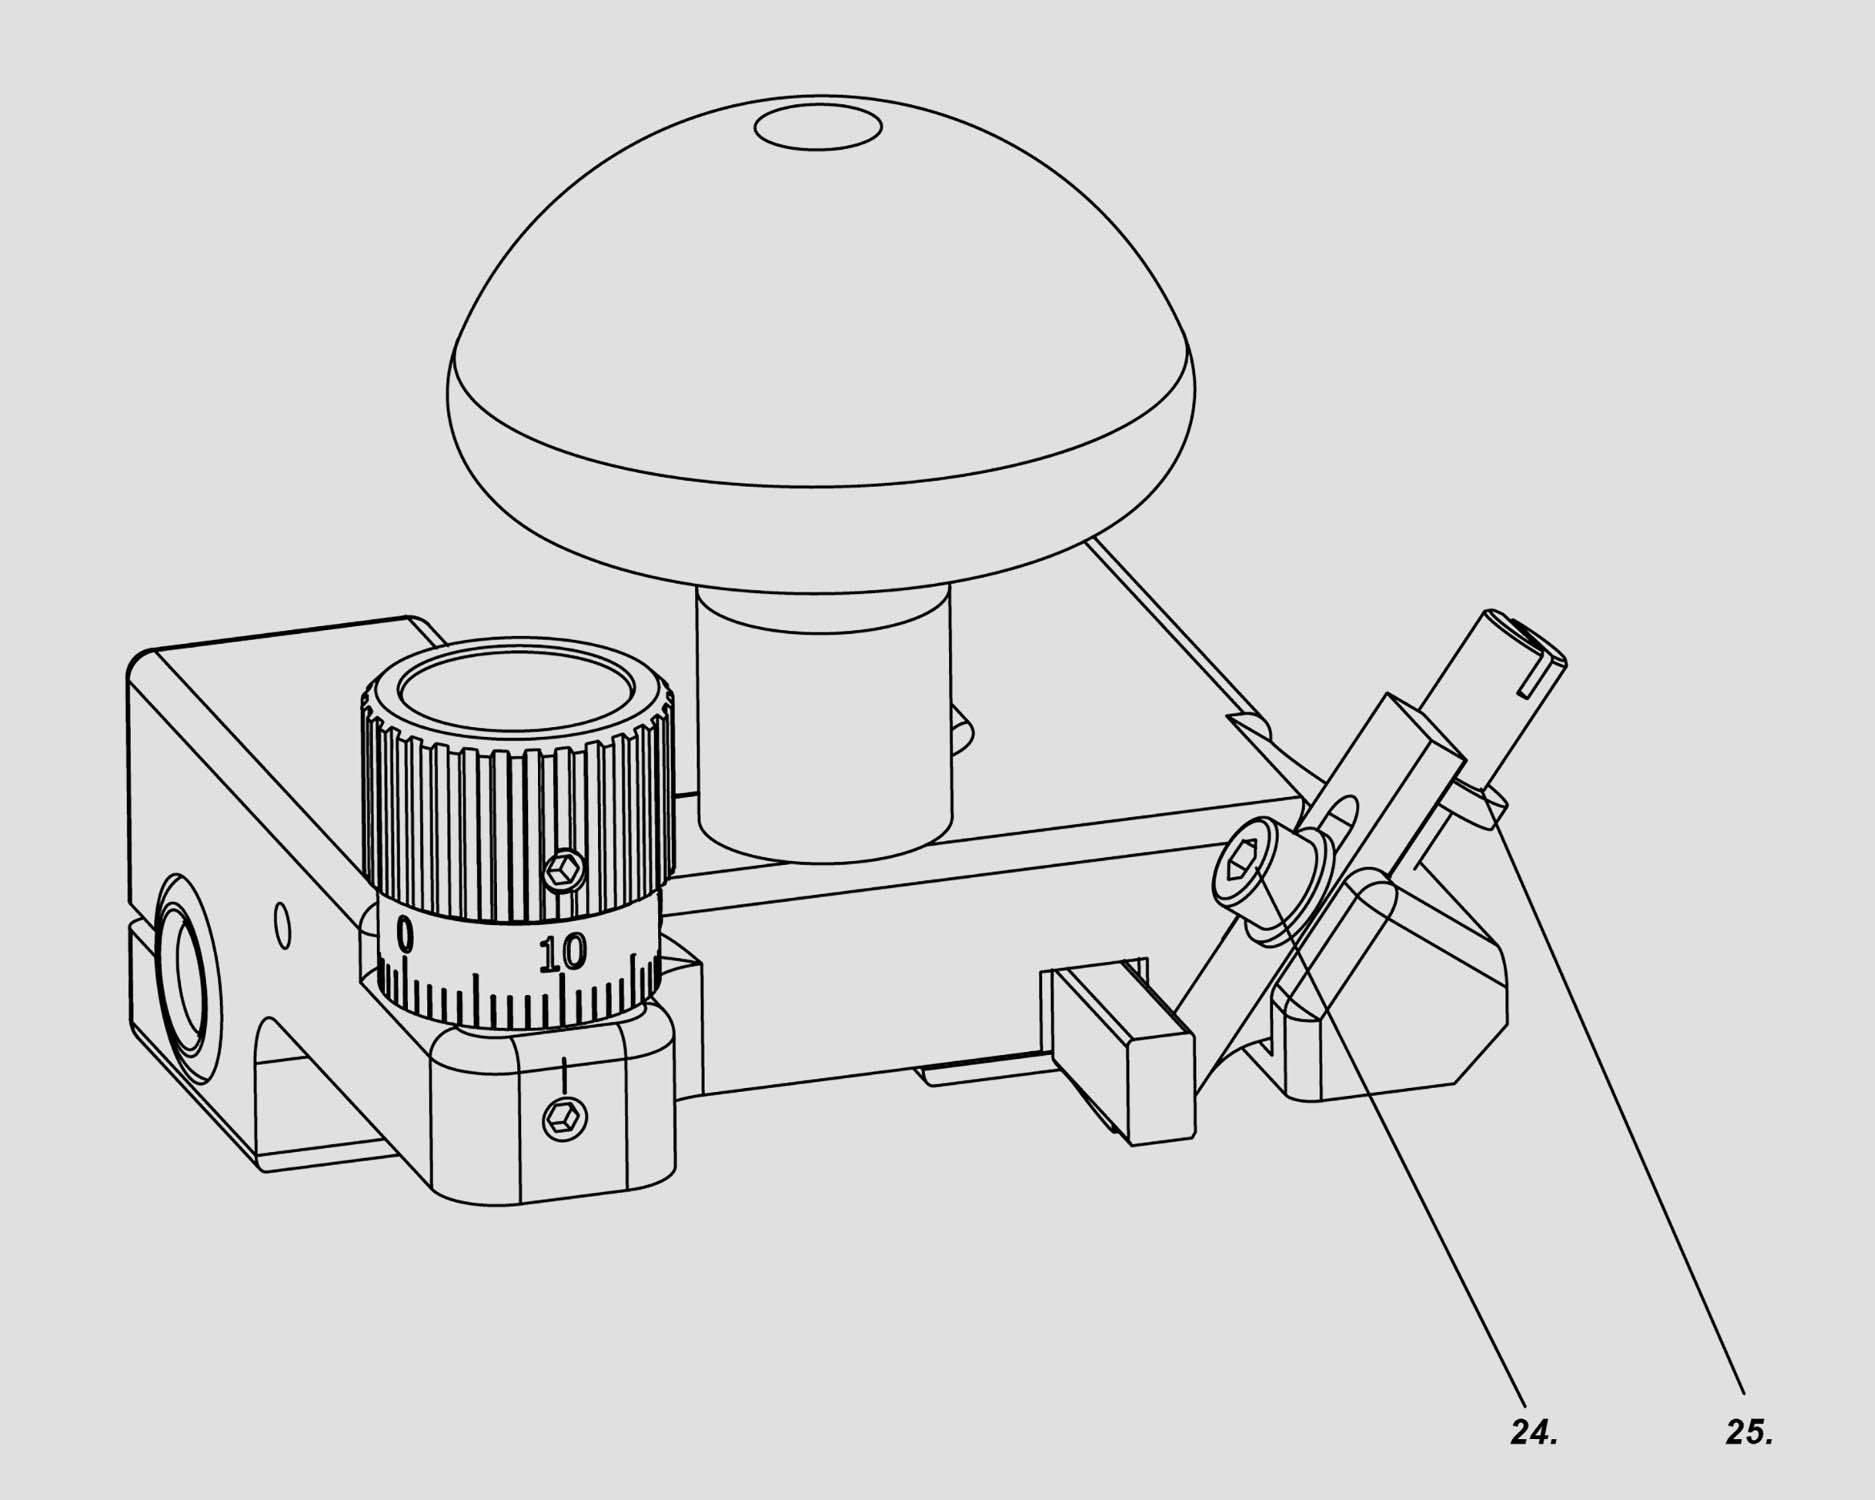
24 Blade Set Screw
25 Blade Adjustment Srew
-
-
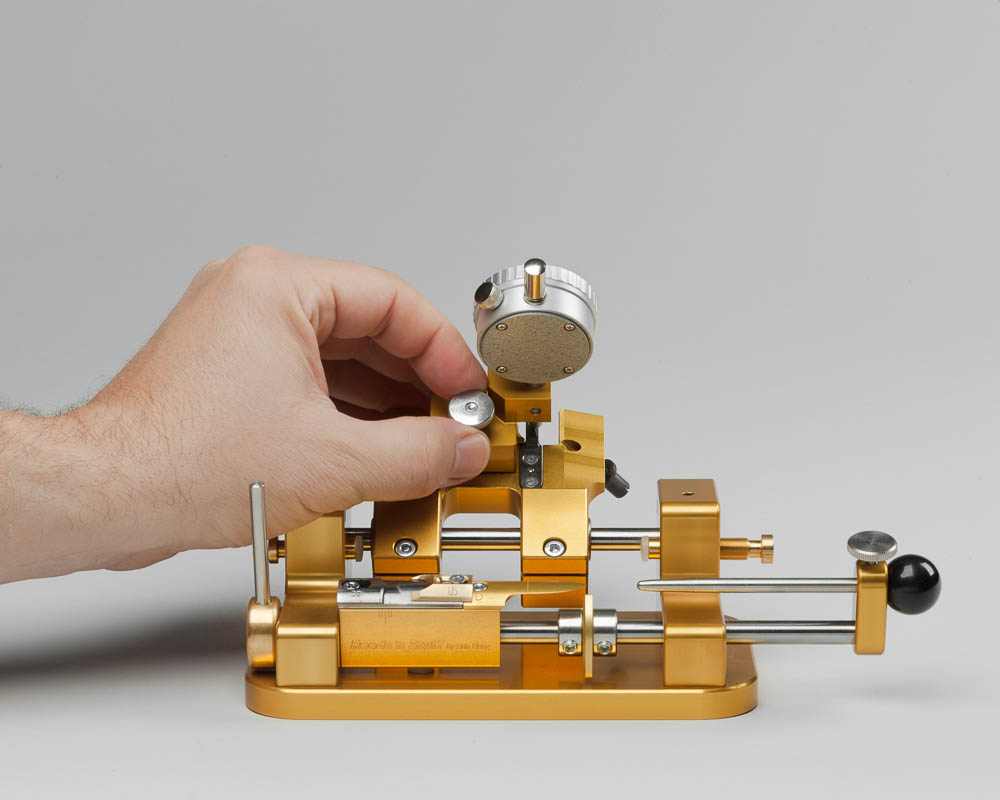
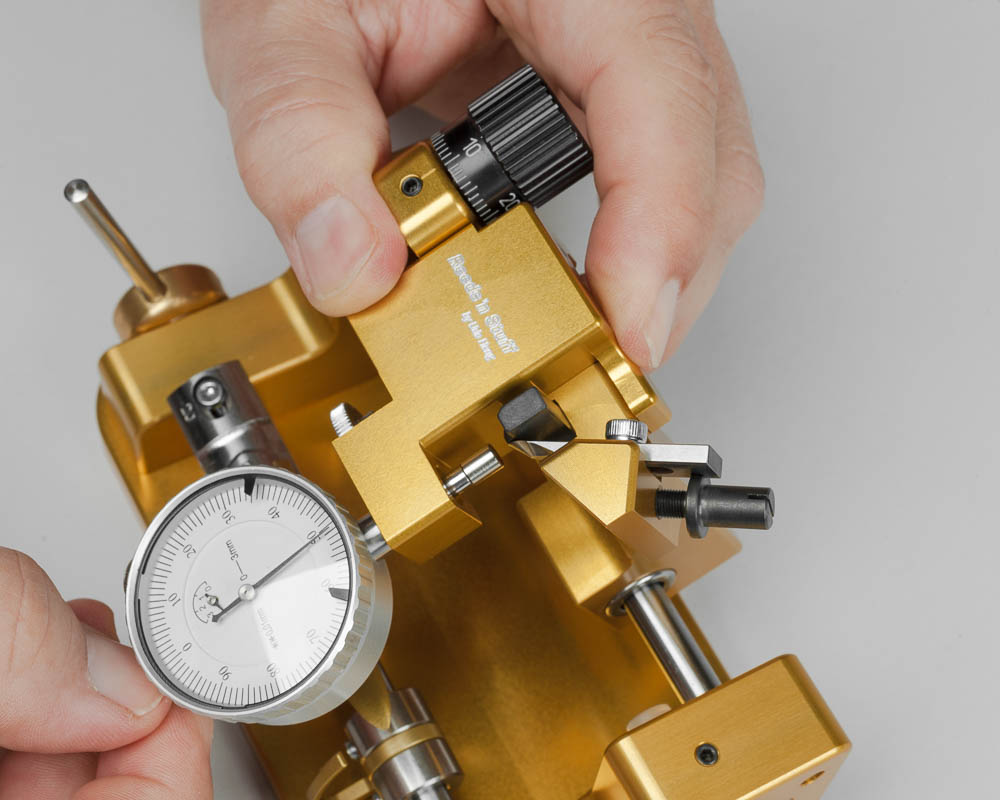
Before you begin, remove both the wooden handle and the blade. Then fit the dial indicator over the carriage as pictured.
-
-
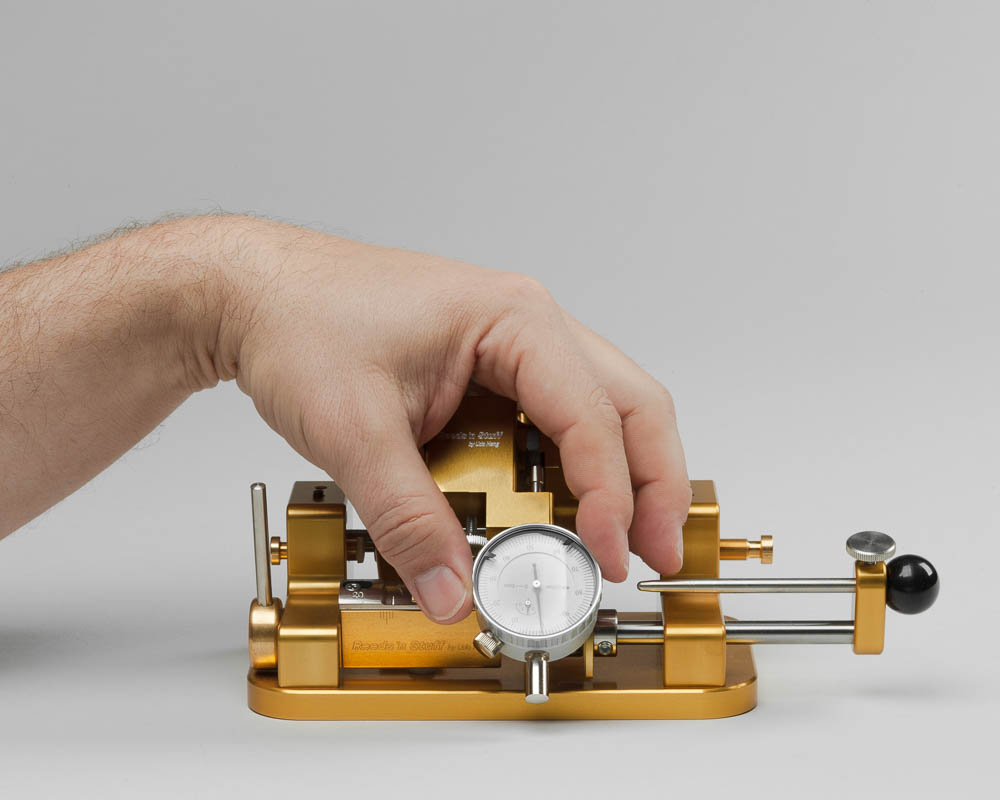
Tighten the large screw on the dial indicator to secure it.
-
-
Rotate the clock face as needed to set the dial indicator to zero.
-

-
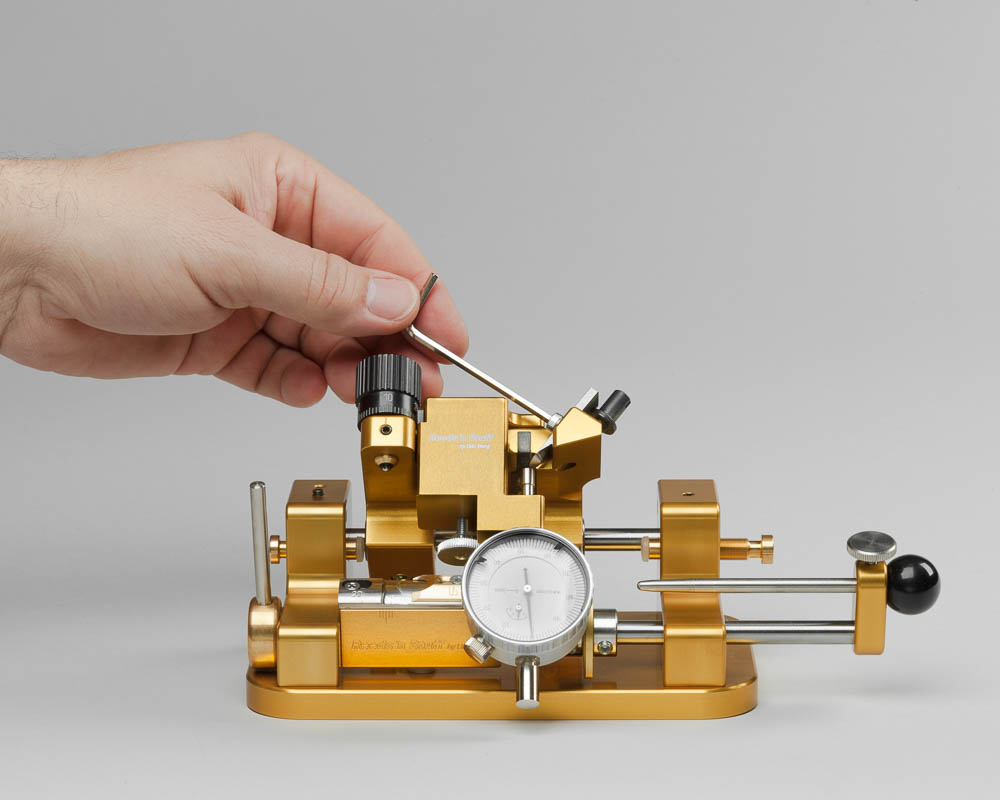
Place the blade on the carriage as pictured. As you slide the blade into place, the slot the side should fit with the corresponding ledge on Screw #25. At this point it is important to confirm that the blade does not protrude beyond the black depth stop.
-
-
Tighten Screw #24 all the way, so that the blade is held completely in place. Then gently loosen it by less than a quarter of a turn, until the blade is held securely but can be moved by turning Screw #25.
-
-
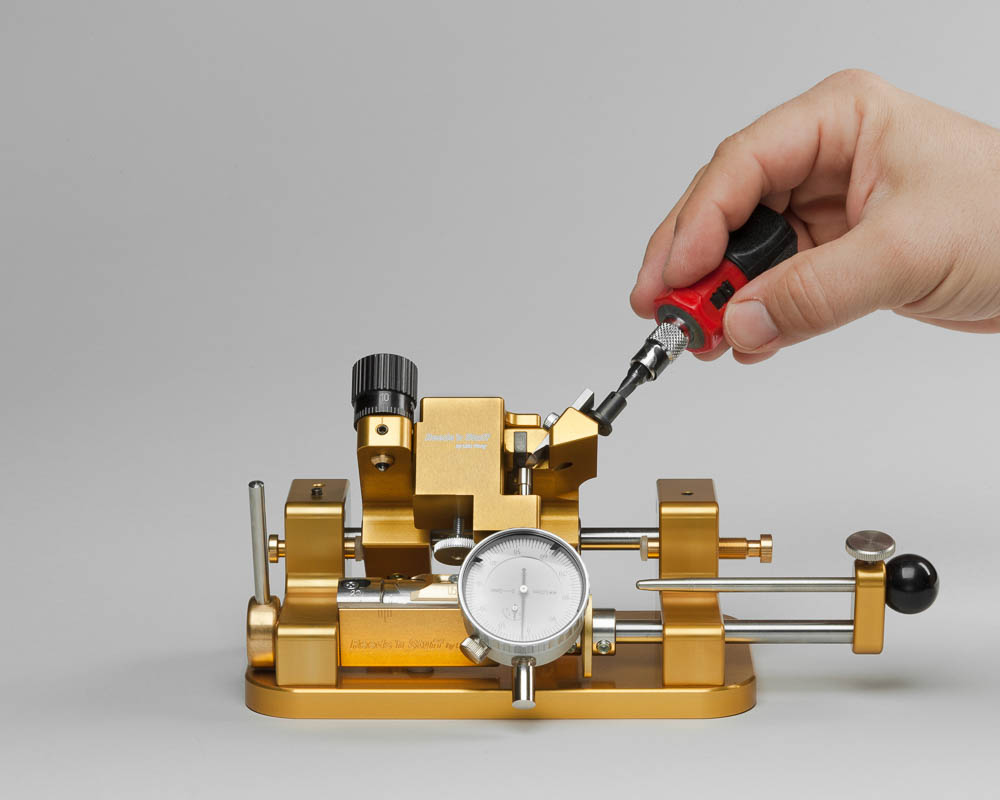
Turn Screw #25 until the dial indicator reads precisely 2.5 to 3 hundredths of a mm (=0.025-0.03 mm) . At this point, the blade depth will be set appropriately.
-
-
Tighten screw #24 all the way. The machine is now ready to use. Before you start using the machine make sure the blade does not touch the tongue. See instructions in chapter: thickness adjustment.
-
-
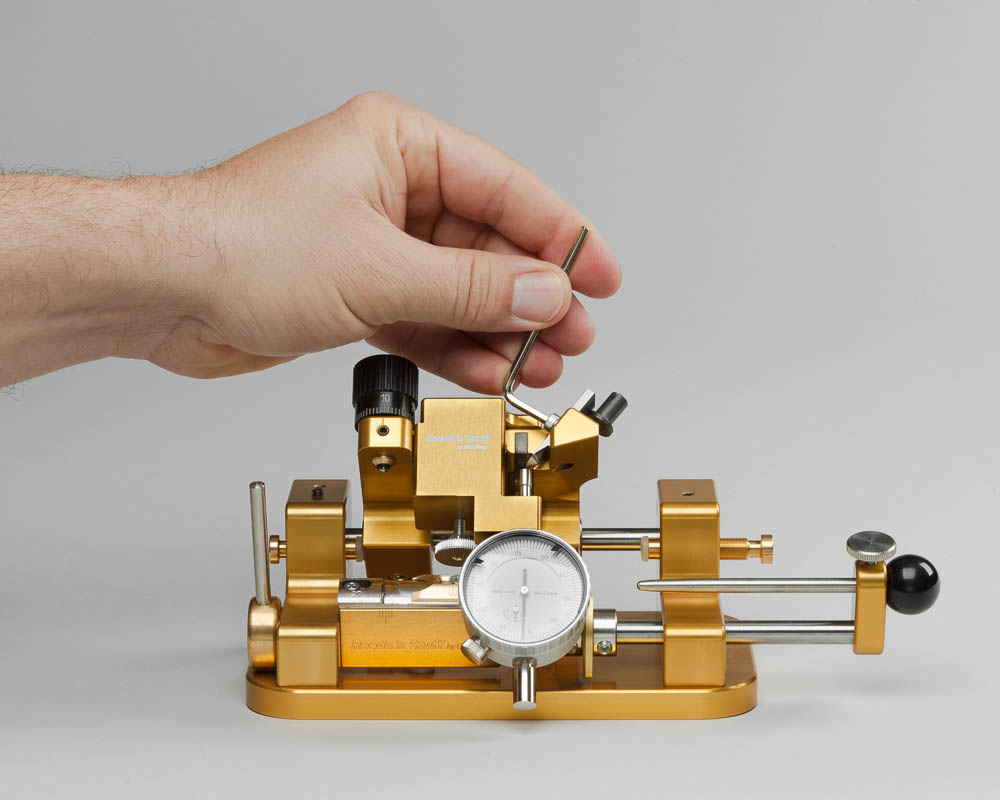
As you remove the dial indicator from the carriage, be sure to pull on the axle of the dial indicator as shown to avoid any damaging contact with the blade.
- Height
- 10.8 cm
- Width
- 5.7 cm
- Depth
- 3.5 cm
- Manufacturer
- Reeds 'n Stuff
- Country of origin
- Germany
- Product number
- F11-13200F11-13200