Figure Machine
pending
General Comments
The purpose of a dial indicator is to provide the thickness measurement at any point of the reed. These measurements can be used as a base line for adjusting your reeds, as well as provide knowledge about the structure of reeds that is not available with the naked eye.
The regular use of a dial indicator can provide reliable and accurate feedback when scraping the reeds, to ensure that not too much cane has been removed from a reed.
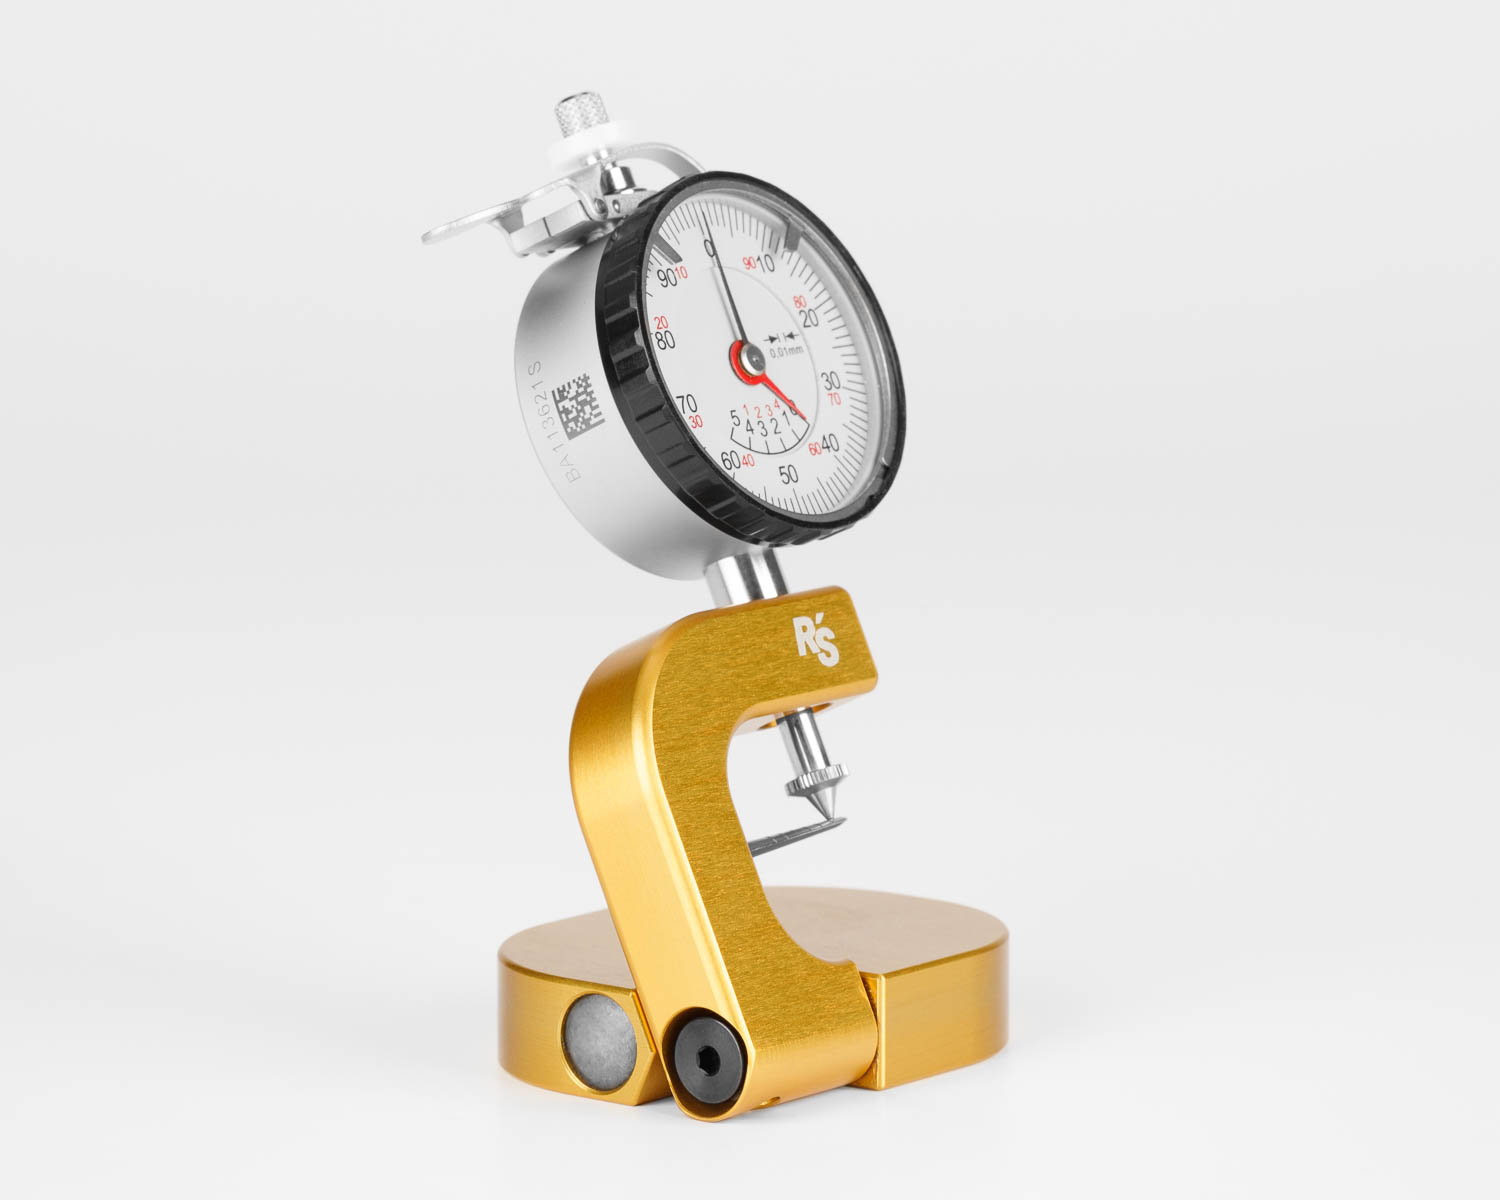
The Mini Dial Indicator is designed with a swiveling base that allows it to pack flat for transport. Additionally, when in use the arm of the dial is angled back to an angle of 65 degrees for a more comfortable reading experience.
Using the Dial Indicator
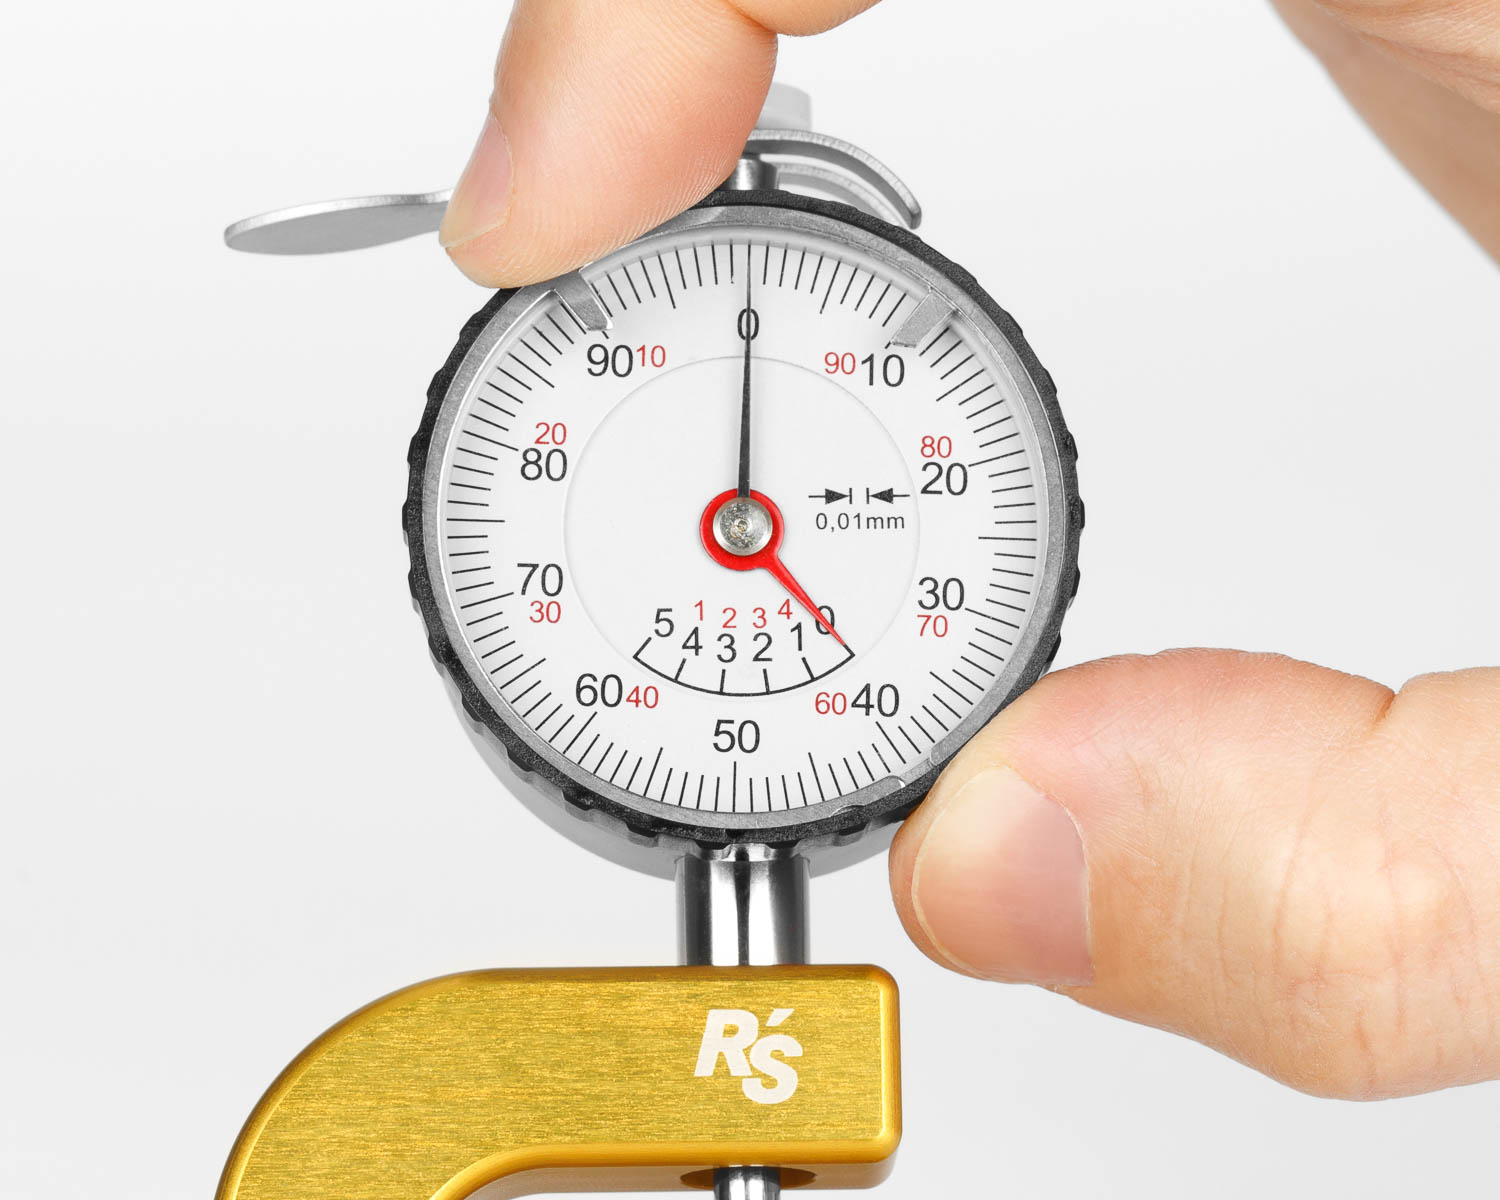
Make sure the dial is zeroed before measuring your reed. Any dirt on the measuring arm will raise the reed and provide an inaccurate reading.
-
-
-
To zero the dial, simply take hold of the face of the dial and rotate it until the "0" is aligned with the pointer.
-
-
-
-
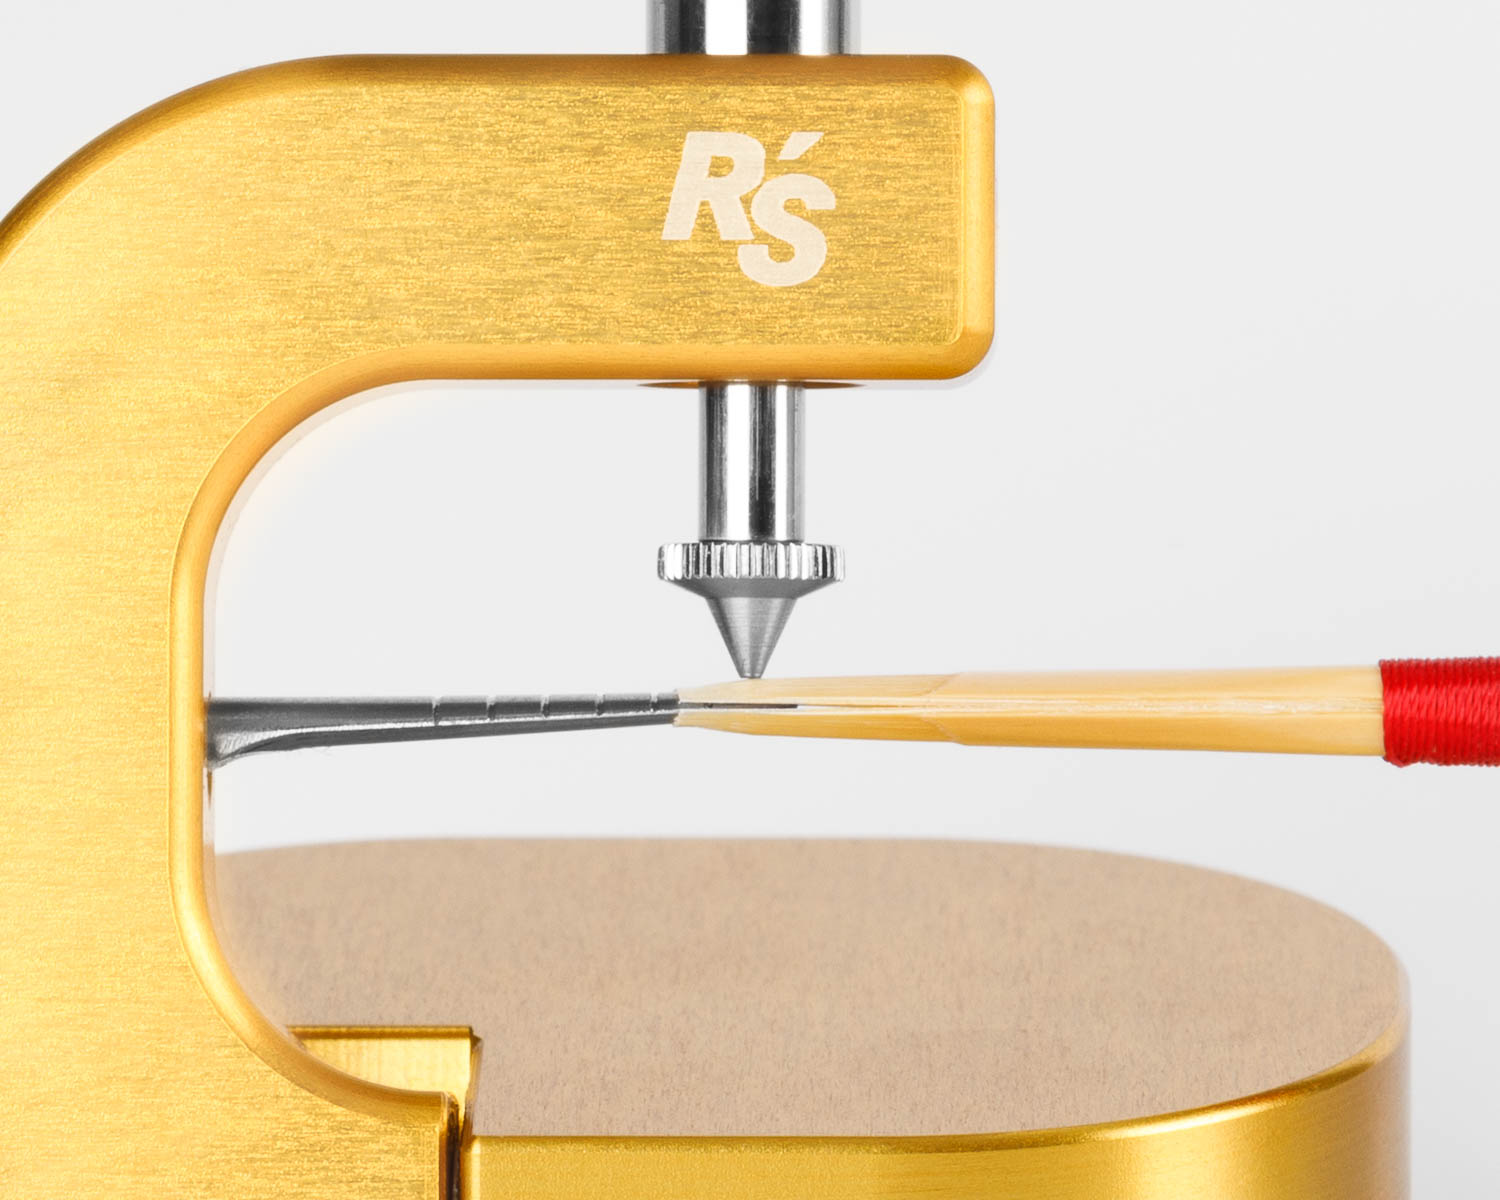
Place the reed around the measuring arm and line the tip up with the location you would like to measure.
-
Note: when moving the reed make sure to lift the measuring tip off of the reed so that it is not dragged across the surface of the reed. With most of the tips this dragging will scratch the surface of the reed. Only the K tip with the ball bearing is designed for the cane to be pulled through while measuring.
Be sure to lower the measuring tip gently to the reed. Lowering the tip agressively, or letting it fall uncontrolled could lead to the measuring tip pressing into, or through, the cane.
Changing the Tip
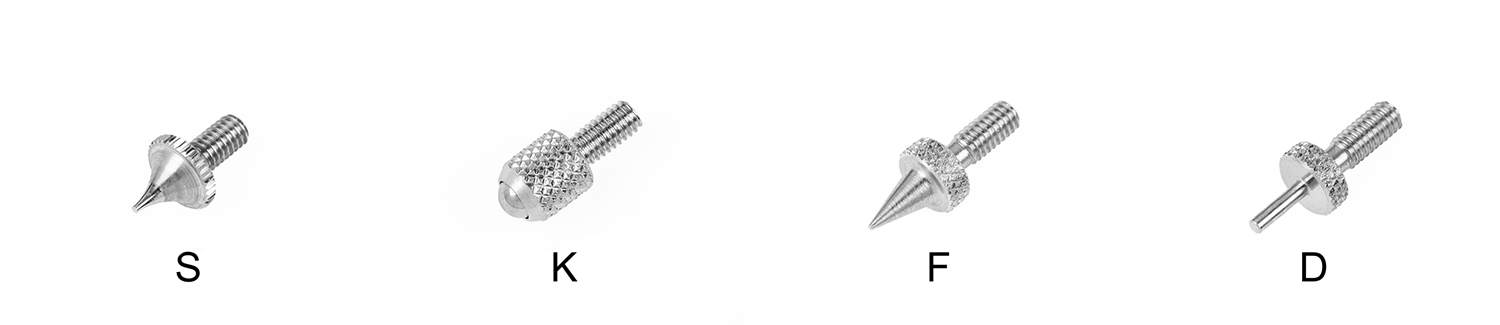
The tip of the dial indicator can be exchanged or replaced. Simply unscrew the tip from the dial and insert the new tip. After doing this, be sure to recalibrate the dial.
Choose among tips S (Standard for bassoon and the mini dial indicator), F, and D to see the point you are measuring from every perspective and to measure exactly at a given point. Choose the ball-pointed tip K for a smooth glide when you pull the cane or reed through, as well as to measure gouged cane.
Calibrating the Dial Indicator
Switching between Left and Right-handed
The dial indicator can easily be transformed from right to left-handed. Simply loosen the set screw at the end of the arm holding the dial.

This will allow you to rotate the dial to face the opposite direction. Be sure to calibrate the height of the dial so it both touches the tongue and reads "0" before tightening the set screw. Be careful not to over-tighten this screw as it will damage the actuating shaft and prevent the dial from operating properly.